安装说明
安装环境:CentOS-6.3
安装方式:源码编译安装
软件:httpd-2.2.6.tar.gz | pcre-8.32.tar.gz | apr-1.4.6.tar.gz | apr-util-1.5.1.tar.gz
下载地址:http://mirror.bjtu.edu.cn/apache/httpd/
http://apr.apache.org/download.cgi
http://jaist.dl.sourceforge.net/project/pcre/pcre
安装位置:/urs/local/apache
安装前提
系统已安装了gcc和cmake,如果没有安装请参考《CentOS-6.3安装配置Cmake》。
执行以下操作:
#检查是否安装了apache
[root@localhost /]# rpm -qa | grep httpd
httpd-2.2.15-15.el6.centos.1.x86_64
httpd-tools-2.2.15-15.el6.centos.1.x86_64
#卸载系统自带的apache
[root@localhost /]# rpm -e --nodeps httpd-2.2.15-15.el6.centos.1.x86_64
[root@localhost /]# rpm -e --nodeps httpd-tools-2.2.15-15.el6.centos.1.x86_64
#使用yum卸载
[root@localhost apache]# yum remove apache
#检验apr版本,卸载安装新版本
[root@localhost apache]# rpm -qa | grep apr
apr-1.3.9-5.el6_2.x86_64
apr-util-1.3.9-3.el6_0.1.x86_64
apr-util-ldap-1.3.9-3.el6_0.1.x86_64
#卸载apr
[root@localhost apache]# yum remove apr
yum remove apr-util-devel apr apr-util-mysql apr-docs apr-devel apr-util apr-util-docs
#安装pcre
[root@localhost local]# tar -zxv -f pcre-8.32.tar.gz
[root@localhost local]# cd pcre-8.32
[root@localhost apr-1.4.6]# ./configure
[root@localhost apr-1.4.6]# make
[root@localhost apr-1.4.6]# make install
#安装新版本apr
[root@localhost local]# tar -zxv -f apr-1.4.6.tar.gz
[root@localhost local]# cd apr-1.4.6
[root@localhost apr-1.4.6]# ./configure --prefix=/usr/local/apr
[root@localhost apr-1.4.6]# make
[root@localhost apr-1.4.6]# make install
#安装apr-util
[root@localhost local]# tar -zxv -f apr-util-1.5.1.tar.gz
[root@localhost local]# cd apr-util-1.5.1
[root@localhost apr-util-1.5.1]# ./configure --prefix=/usr/local/apr-util --with-apr=/usr/local/apr
[root@localhost apr-util-1.5.1]# make
[root@localhost apr-util-1.5.1]# make install
安装apache
将httpd-2.4.3.tar.gz上传到/usr/local中,执行以下操作:
#执行安装
[root@localhost local]# cd /usr/local
[root@localhost local]# tar -zxv -f httpd-2.4.3.tar.gz #解压压缩包
[root@localhost local]# rm -rf httpd-2.4.3.tar.gz #删除压缩包
[root@localhost local]# mv httpd-2.4.3 apache
[root@localhost local]# cd apache
#设置参数安装
[root@localhost php5.4]# ./configure --prefix=/usr/local/apache --with-apr=/usr/local/apr --with-apr-util=/usr/local/apr-util/
[root@localhost php5.4]# make
[root@localhost php5.4]# make install
验证安装
启动apache服务器:
[root@localhost /]# /usr/local/apache/bin/apachectl start
使用浏览器访问:http://192.168.15.239/ 出现以下信息:
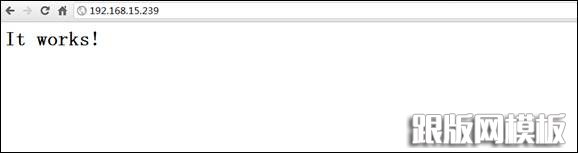
恭喜,安装成功!!